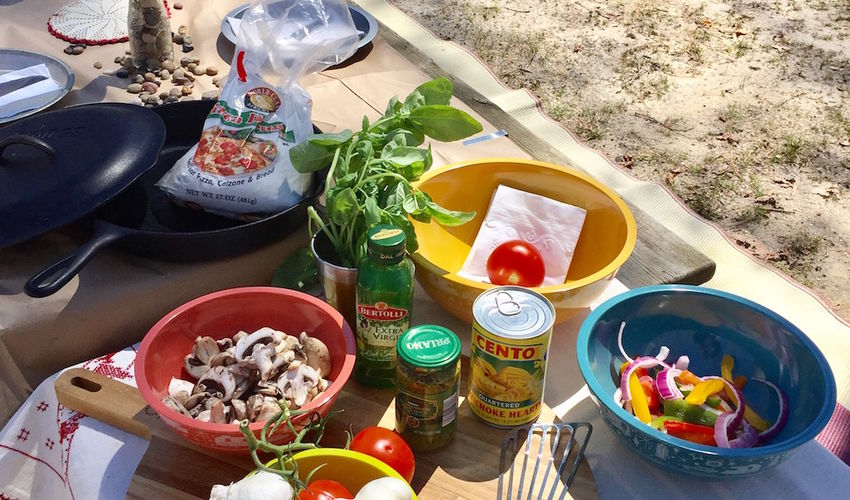
There are a few components needed for campfire pizza to be a success. The first is a really well seasoned cast iron pan. My favorite pizza pan is the Lodge 12” pan with the lid. After each use I clean it with a non-soapy cloth, oil it and place it on the flame on top of the stove for a few minutes. With proper care cast iron pots just get better and better and should last for generations.
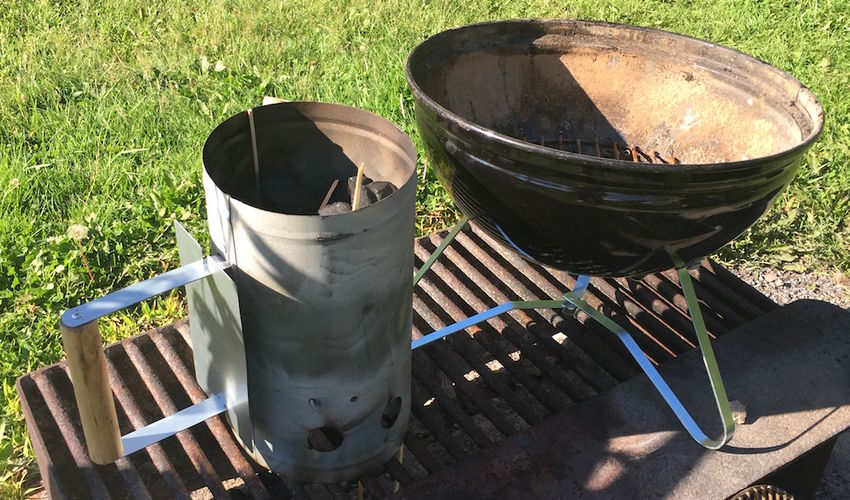
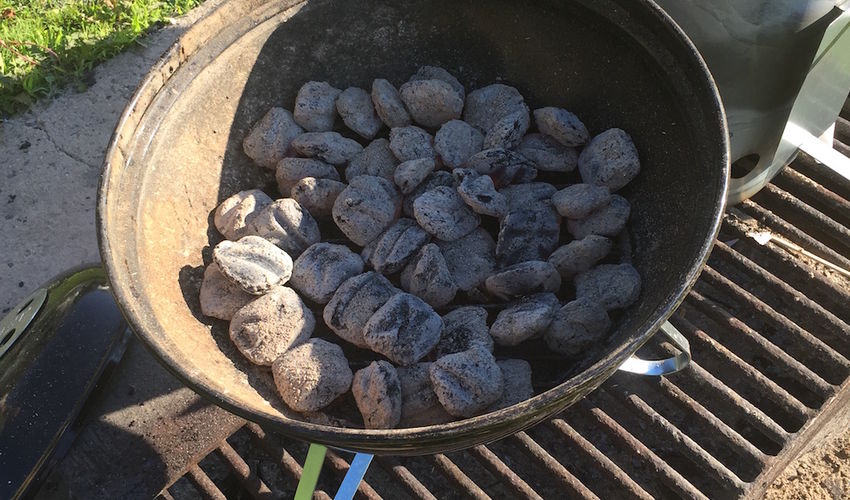
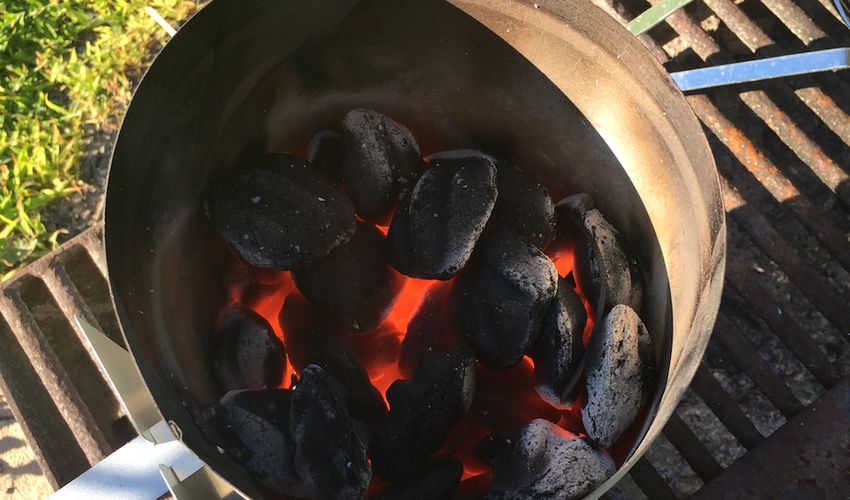
Another necessity is a charcoal chimney to get your briquettes started and evenly heated. I always use real charcoal briquettes that are not pretreated with lighting fluid. I actually have several chimneys because when cooking for a crowd the heat source will probably need replenishing. I start the chimneys about ten minutes apart.
Although I could use the firepit at the campsite I have found better results using a small Weber kettle which contains the heat in a small area and is almost the same size as my pan. I use several at a time when cooking for a crowd.
You will also need a good set of fire resistant gloves, a metal spatula and a small skillet if you want to cook any veggies or toppings that you are going to use to top your pizza.
Getting started!
I always like to have a campfire going at the same time because I will use it to cook the toppings and to heat up the lid of the cast iron pan. If your firepit has an adjustable cook top, set it to a lower setting once you have a good coal bed going with the fire.
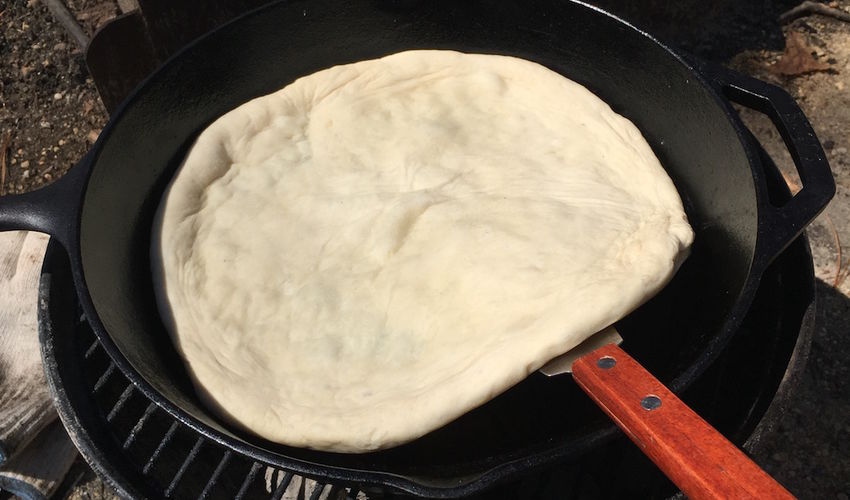
I line up 2 or 3 charcoal chimneys and light them about ten minutes apart. Once the coals are mostly white but still showing some black edges I transfer them to the bottom rack on my little Weber kettle grill. There is only one setting on that grill for the top rack and I have discovered that it is the perfect distance between the cast iron pan and the coals. It cooks without burning. I set the empty cast iron pan on the grill grate to start heating it up. It is important that you put the dough in a hot pan. Shake a drop of water on the cast iron pan to check it for heat. If it dances, you are ready to go.
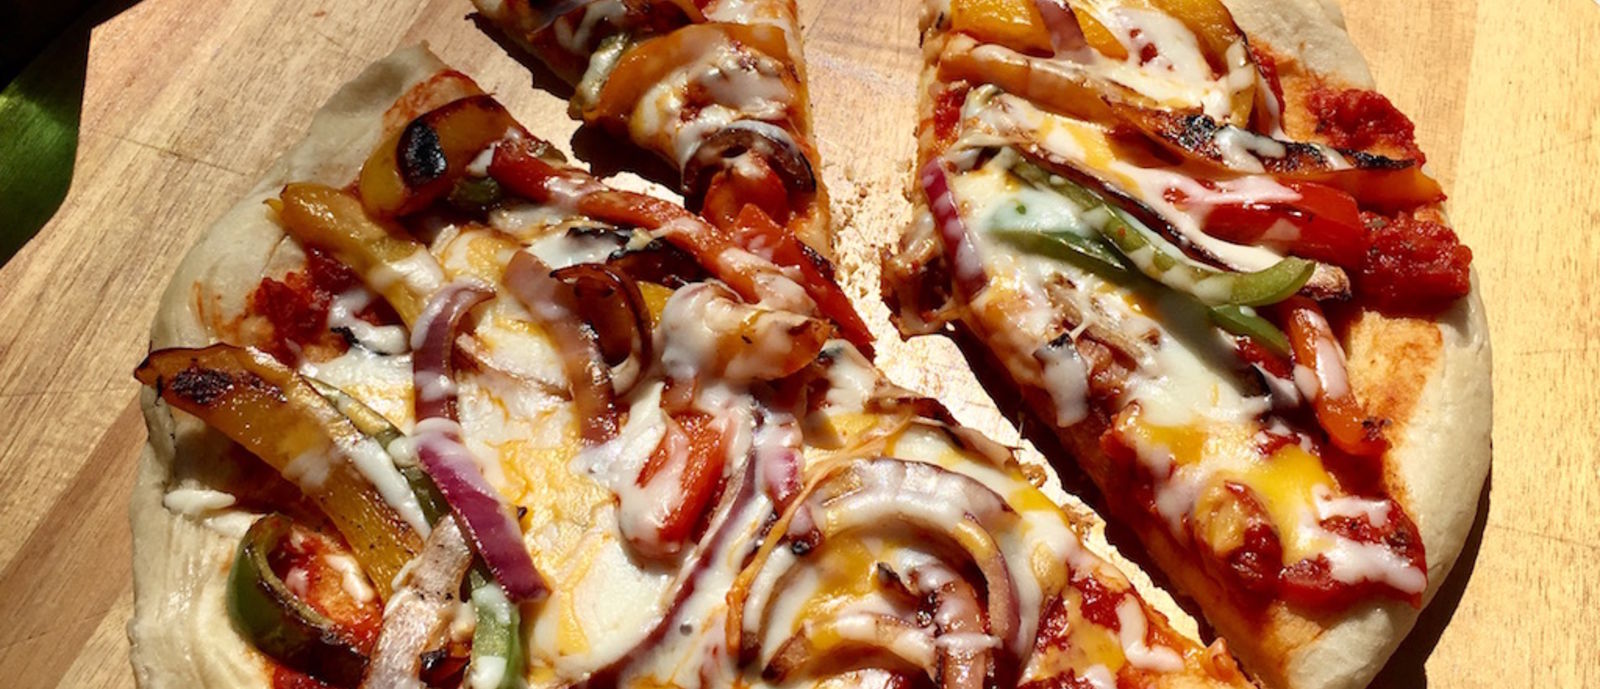
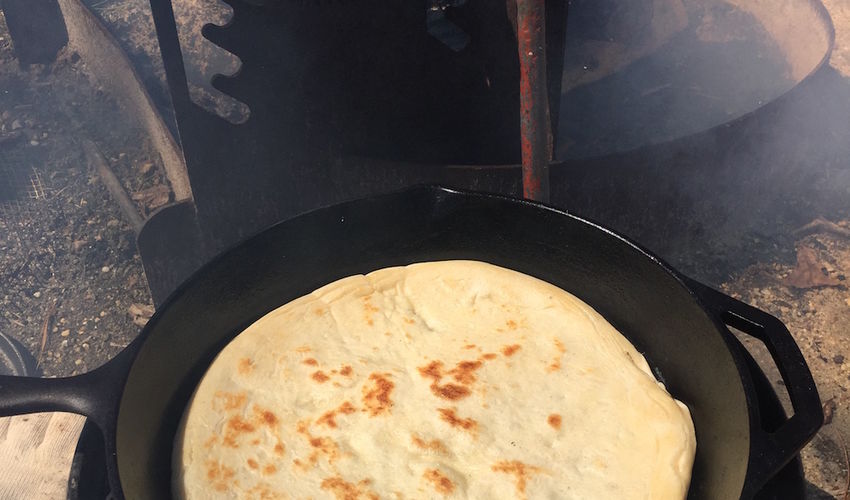
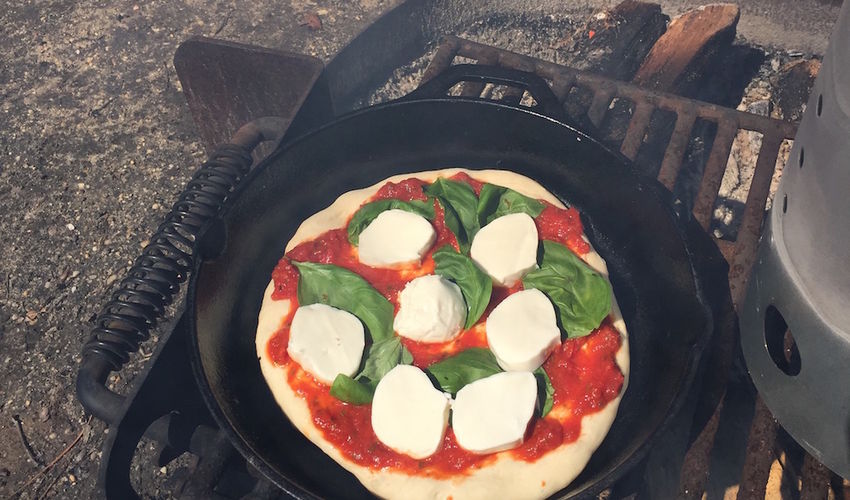
I take the dough out of the refrigerator an hour ahead of time depending on the outdoor temperature. For a fall cookout that is usually enough time to let it come to room temperature and make it easy to work with. The store bought dough available near me is actually enough for two pizzas in the 12” pan. I cut the dough in half and form the circle on a cutting board and then carefully drop it into the hot pan. You have a few seconds to move it around before it “sets” on the steel. After about two minutes I flip it to the other side with the metal spatula and then start adding the sauce and toppings. This is not a meal you walk away from while it is cooking. Stand by because it cooks quickly. You can leave the pan open face for a softly melted cheese topping or you can use a second grill or the campfire to heat the lid of the fry pan. When you place the heated lid on the pan the heat will brown and bubble the cheese on top of the pizza. It usually takes less than five minutes to cook the second side.
In order to cook the most pizzas on the first set of hot coals I get the second half of the dough ball ready to go while the first pizza cooks. I use the metal spatula to pull the cooked pizza off the pan and onto a big round cutting board that I always bring on camping trips. While it’s cooling a minute I watch and then flip the second pizza dough and add the toppings.
The fun part about pizza at the campground is all the possible flavor combinations. I will often ask friends I am camping with to bring their favorite toppings and I provide the dough and sauces. We have fun experimenting and tasting new creations.
Some of my Favorite Pizza Combinations
- Pesto, shaved fresh parmesan and heirloom tomatoes.
- Alfredo sauce, slivered garlic slices, artichokes, shredded chicken and cheese.
- Red sauce, prosciutto, bacon and sausage.
- Spinach, goat cheese and Kalamata olives.
Lastly, you can make a dessert pizza by cooking the dough on both sides and then adding Nutella and strawberries; Nutella, chopped nuts and powdered sugar or Nutella, crumbled graham crackers and mini marshmallows. Put the lid on top of the marshmallows to toast them for a few minutes and you have a S’mores pizza, the perfect ending to a pizza making camp meal.
What you will need for the Girl Camper Method:
Cooking Tools
- Large cast iron frying pan
- Charcoal Chimney
- Charcoal (never use the kind presoaked in lighter fluid)
- Small round grill
- Oven mitt
- Metal spatula
- Small skillet to cook toppings
Food
- Premade pizza dough
- Favorite sauce
- Mozzarella Cheese
- Toppings