

{"preview_thumbnail":"/sites/default/files/styles/video_embed_wysiwyg_preview/public/video_thumbnails/ubuCzyJDQsE.jpg?itok=dZWjM9Zw","video_url":"https://youtu.be/ubuCzyJDQsE","settings":{"responsive":1,"width":"854","height":"480","autoplay":0,"title_format":"@provider | @title","title_fallback":true},"settings_summary":["Embedded Video (Responsive)."]}
Once your RV is parked, leveled, and stabilized at the campsite, it’s time to hook up the RV. Setting up your RV’s core systems—water, sewer, and electricity—is what transforms your vehicle into a functioning home on wheels. These systems provide comfort and the basic essentials you need to enjoy your adventure.
In Episode 4 of Go RVing’s RV Newbie Tool Kit, former NFL player and outdoor enthusiast Matt Light walks through the process of hooking up your systems.
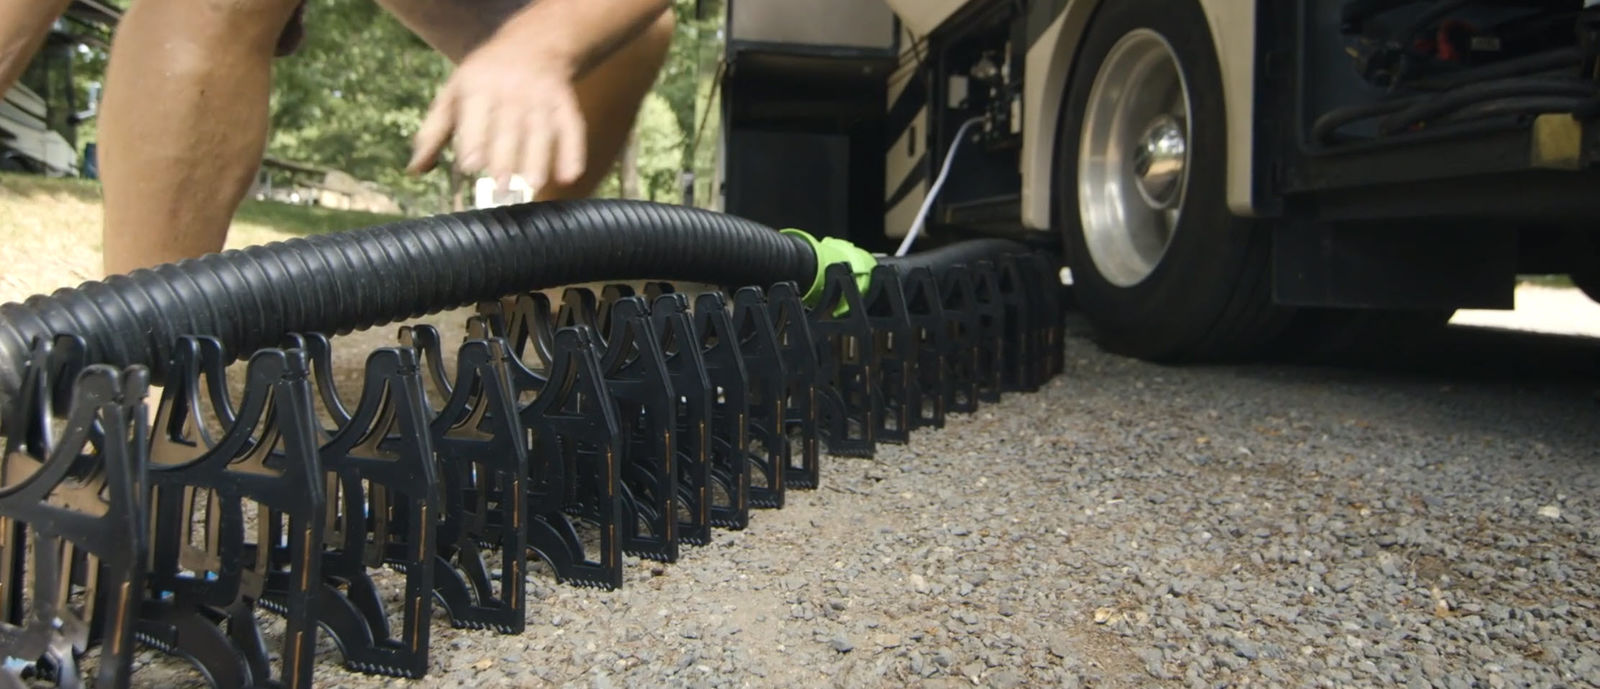
Step 1: Sewer Setup—The Right Way
Yes, we’re starting with everyone’s favorite system: the sewer.
Why it matters:
Proper sewer setup is essential for hygiene, convenience, and campground etiquette. Incorrectly connected or supported sewer hoses can lead to unpleasant (and avoidable) messes.
What you’ll need:
- A durable sewer hose
- A sewer hose support (accordion-style is popular)
- Sewer fittings/adapters (elbow or donut-style connectors)
- Disposable gloves (a must!)
- Optional: a clear elbow connector to monitor waste flow
Key Tips from Matt:
- Elevate the hose: Use a support system to create a downward slope from your RV to the sewer connection. This ensures gravity works in your favor and prevents waste from collecting in low spots.
- Use multiple hose sections: Campground sewer hookups vary in distance. Bring extensions to reach comfortably.
- Secure your connection: Use a locking adapter or collar to keep the sewer hose attached to the RV outlet. A loose hose can cause a spill, which is not only unpleasant, it’s a campground faux pas.
Pro Tip: Never open the black tank valve and leave it open throughout your stay. Always dump black tanks when they’re at least 2/3 full, followed by the gray tank to help flush the hose clean.
For more detailed guidance, check out Sewer 101: How to Safely Hook Up and Dump Your RV Tank.
Step 2: Water Hookup—Fresh, Filtered, and Safe
Water setup is next—and arguably the most important creature comfort in your RV.
What you’ll need:
- A white freshwater hose (dedicated to potable water)
- A water pressure regulator
- An inline water filter
- Optional: a Y-valve splitter if you want to hook up an outdoor hose too
How to set up your water:
- Attach the pressure regulator directly to the campground spigot. This protects your RV’s plumbing from surges or high water pressure (which can exceed 100 PSI at some campgrounds). Regulators bring pressure down to a safe 40–50 PSI.
- Attach the inline water filter to the regulator or hose. This filters out sediments and contaminants, improving taste and water quality.
- Connect your freshwater hose to the "city water inlet" on your RV. Make sure you’re not accidentally connecting to the black tank flush port—they often look similar.
Avoid using green garden hoses—they’re not rated for drinking water and can leach harmful chemicals.
Pro Tip: Run the hose briefly before connecting it to the RV to flush out any debris.
For a more detailed guide to your RV’s water system, check out Water 101: How to Hook Up Water to Your RV Like a Pro.
Step 3: Electric Hookup—Powering Up Safely
Electricity is what keeps your lights, outlets, air conditioning, and appliances running—so don’t skip steps when plugging in.
What you’ll need:
- A surge protector or electrical management system (EMS)
- A power cord appropriate for your RV (30-amp or 50-amp)
- Adapters ("dogbones") for converting between 15, 30, and 50 amps
How to hook up:
- Turn off the power at the pedestal before connecting anything.
- Plug in your surge protector first. This device protects your RV from dangerous surges, miswired pedestals, or low voltage.
- Connect your RV’s power cord to the surge protector.
- Turn the breaker on at the pedestal.
Matt emphasizes surge protection as a "must-have." It may seem like overkill until the day it saves your RV's electronics from a power spike.
Pro Tip: Use a multimeter or surge protector with diagnostics to check the campground pedestal before plugging in.
For more on this topic, read Beginner’s Guide to RV Electrical Systems and Propane.
Why Mastering These Systems Matters
Learning to confidently set up your RV’s systems will reduce stress and increase your enjoyment. Whether you’re boondocking in the mountains or plugged in at a resort, these systems keep your RV functional and comfortable.
Here’s a quick summary of Matt Light’s top tips:
- Use a sewer hose support to maintain a steady flow and avoid backups.
- Keep enough sewer hose extensions and secure your connections.
- Always use a surge protector when plugging into campground electricity.
- Install a water pressure regulator and use a dedicated freshwater hose.
Final Word: Practice Before You Camp
One of the best takeaways from the RV Newbie Tool Kit series is to practice setting up your RV systems at home before your first trip. Run through water, sewer, and electric setups in your driveway so you’re confident when you arrive at the campground.
When in doubt, reference your RV owner’s manual and seek out expert sources like the RV Technical Institute or other trusted resources on Go RVing.